Upgrading your laptop cooling system can be a game-changer when it comes to performance, longevity, and overall device reliability. Many laptop users notice that over time, their devices begin to overheat, leading to reduced processing speeds, unexpected shutdowns, and even permanent damage to internal components. In this article, we’ll delve into a comprehensive, step-by-step guide on how to upgrade your laptop cooling system, ensuring that your device remains efficient and durable even under heavy use.
When we talk about a laptop cooling system, we’re referring to the combination of hardware and techniques that help dissipate heat generated during operation. This includes both the internal components such as fans and heat sinks, as well as external solutions like cooling pads. If you’ve ever experienced sluggish performance during long work sessions or gaming marathons, chances are your laptop cooling system is under stress. Upgrading it can lead to a noticeable boost in performance, reduced thermal throttling, and an overall smoother computing experience.
In today’s fast-paced digital age, maintaining a robust laptop cooling system isn’t just about performance; it’s about ensuring that your investment lasts. With advancements in technology, many modern laptops come with sophisticated cooling systems, but these can still benefit from upgrades and regular maintenance. Moreover, environmental factors such as high ambient temperatures or dust accumulation can degrade the cooling system over time. Upgrading not only addresses these issues but also prepares your laptop to handle future software demands and more intensive tasks.
Before diving into the upgrade process, it’s crucial to understand what constitutes a laptop cooling system. At its core, this system is designed to draw heat away from sensitive components like the CPU and GPU. The process typically involves a series of fans, heat sinks, and sometimes even liquid cooling solutions in high-end or customized laptops. By enhancing this system, you’re effectively improving the airflow and heat dissipation, which directly contributes to better performance and stability.
It’s also important to note that upgrading your laptop cooling system might require a bit of technical know-how. While some upgrades can be performed by the average user with the help of online tutorials and proper tools, others might necessitate professional assistance. Nonetheless, a well-planned upgrade can be a rewarding DIY project, offering both learning opportunities and tangible performance benefits.
Throughout this article, we’ll use clear language, practical examples, and step-by-step instructions to guide you through every facet of upgrading your laptop cooling system. Whether you’re a seasoned tech enthusiast or a beginner looking to extend the lifespan of your laptop, our ultimate 5-step blueprint will walk you through the entire process. We’ll cover everything from understanding your current cooling system’s limitations to detailed disassembly, installation, and testing procedures. By the end, you should feel confident in your ability to make informed decisions about upgrading your cooling system.
In addition to technical instructions, this guide also emphasizes the importance of maintenance and regular check-ups. Even after a successful upgrade, routine cleaning and periodic inspections are essential to keep your laptop cooling system performing at its best. With a little bit of effort, you can significantly reduce the risk of overheating, ensuring that your laptop remains in peak condition for years to come.
So, if you’re ready to dive into the world of laptop performance enhancement and learn how to upgrade your laptop cooling system efficiently, keep reading. The following sections will break down the process into manageable steps, ensuring that you don’t miss any critical details along the way. We’ll explore the components involved, necessary tools, safety precautions, and even troubleshooting tips for common issues. By understanding both the theory and practice behind these upgrades, you’ll be well-equipped to take your laptop’s performance to the next level.
As you progress through this guide, remember that every laptop is different, and what works for one model might require slight adjustments for another. However, the fundamental principles of heat management and airflow optimization remain the same. Let’s embark on this journey towards a cooler, more efficient computing experience by first understanding the intricate details of your laptop’s cooling system.
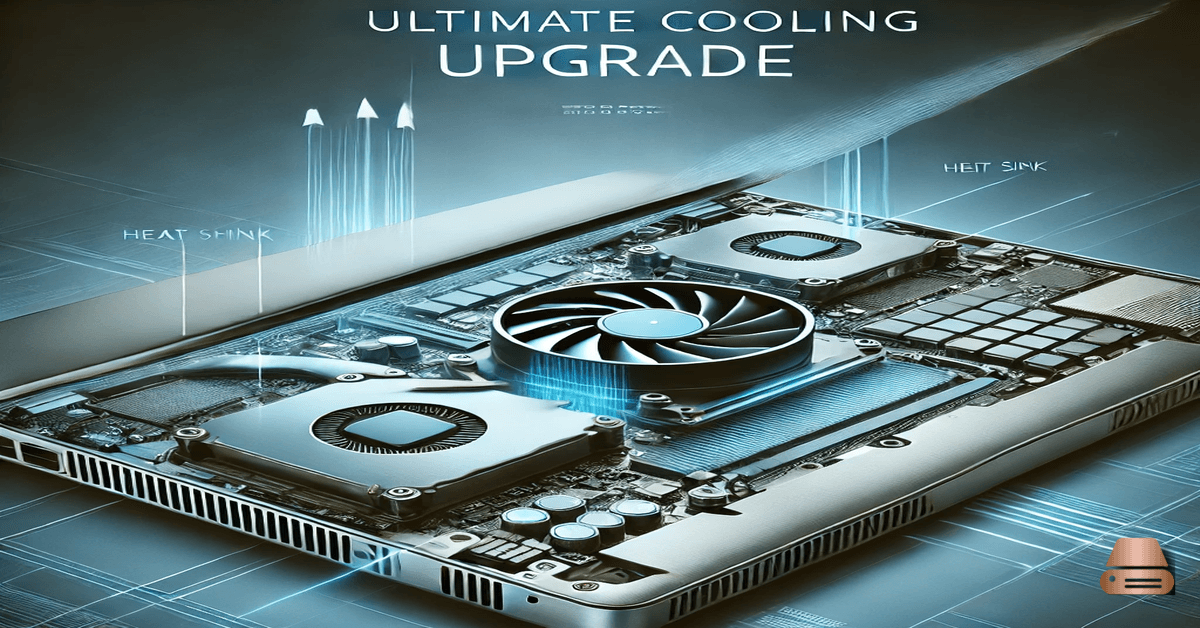
Understanding Your Laptop Cooling System: Components and Functionality
A well-functioning laptop cooling system is essential for keeping your device operating efficiently, especially during high-demand tasks like gaming, video editing, or even extended browsing sessions. This section provides a detailed exploration of the components that make up your laptop cooling system, both internal and external, and explains how they work together to manage heat.
Internal Cooling Components
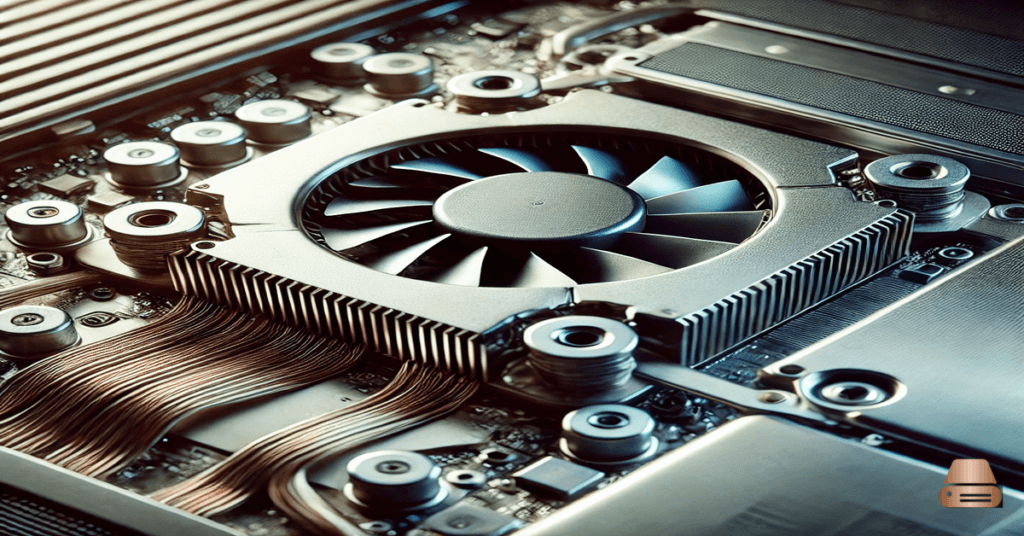
The heart of your laptop cooling system lies within its internal components. Most laptops rely on a combination of fans, heat sinks, and thermal paste to regulate temperature. The fan plays a crucial role by circulating air through the chassis, drawing cool air in, and expelling hot air out. Heat sinks, typically made of metal such as aluminum or copper, are attached directly to the CPU and GPU. They absorb and dissipate heat away from these critical components, ensuring that the internal temperature remains within safe limits.
One often overlooked component is the thermal paste, a substance applied between the CPU or GPU and the heat sink. This paste fills microscopic gaps on the surfaces, improving thermal conductivity and ensuring that heat is transferred efficiently. Over time, thermal paste can dry out and become less effective, which is why upgrading or replacing it is a key part of maintaining an optimal laptop cooling system.
Manufacturers design these internal cooling components to work harmoniously, yet prolonged usage, dust accumulation, and the natural degradation of materials can compromise their efficiency. Upgrading your laptop cooling system may involve cleaning these components, replacing worn-out fans, or even applying a fresh layer of thermal paste. With a little technical know-how and the right tools, you can significantly enhance the cooling performance, thereby boosting the overall longevity and reliability of your laptop.
External Cooling Solutions
Apart from the internal components, external cooling solutions also play an important role in maintaining the temperature of your laptop. External cooling devices, such as cooling pads or stands with built-in fans, are designed to supplement the internal cooling system. They provide additional airflow, which helps to lower the ambient temperature around the laptop. This is especially useful in environments where the internal cooling system alone may struggle to keep temperatures down.
Many users find that incorporating an external cooling solution into their setup can result in a noticeable improvement in performance. For example, a cooling pad can reduce the overall temperature of the laptop by several degrees, thereby preventing overheating and thermal throttling during intensive tasks. When combined with an upgraded internal laptop cooling system, these external aids create a comprehensive heat management solution that is hard to beat.
It’s also worth noting that external cooling solutions are relatively inexpensive and easy to install. They require little to no technical expertise, making them an attractive option for users who are looking to boost their laptop’s performance without undertaking a full internal upgrade. However, for the best results, a combination of both internal upgrades and external aids is recommended.
The Synergy of Cooling Components
Understanding the synergy between the various components of your laptop cooling system is crucial for effective upgrades. Each element—from the fans to the heat sinks and even external cooling pads—plays a distinct role in ensuring that heat is efficiently managed. When one component is improved or replaced, it can have a cascading effect on the overall cooling efficiency. For instance, a more powerful fan can help a newly applied thermal paste work even more effectively by directing a steady stream of cool air over the heat sink.
Moreover, a balanced cooling approach prevents any single component from being overburdened. This balance is essential not only for maintaining optimal temperatures but also for prolonging the lifespan of your laptop’s internal components. By investing in an upgrade for your laptop cooling system, you’re essentially investing in the long-term performance and durability of your device.
In this section, we’ve broken down the internal and external components of your laptop cooling system and examined how they work in unison. The next step is to evaluate your current setup and plan your upgrade meticulously—a process that requires careful consideration of both the technical and practical aspects of your laptop. Armed with this understanding, you’re now ready to move on to the planning phase of your upgrade journey.
Pre-Upgrade Considerations and Planning
Before diving headfirst into the physical upgrade of your laptop cooling system, it’s essential to perform a thorough evaluation of your current setup and plan the process step by step. A well-thought-out plan can save you time, money, and potential frustration down the road. This section covers everything you need to consider—from evaluating performance issues to assembling the required tools and budgeting for the upgrade.
Evaluating Your Current Cooling System
The first step in upgrading your laptop cooling system is to evaluate the performance of your existing setup. Begin by monitoring your laptop’s temperature during different tasks using software utilities designed for this purpose. Tools like HWMonitor or Core Temp can help you track how your system responds under stress. If you notice that temperatures consistently exceed safe limits or if you experience thermal throttling, it’s a clear sign that your cooling system might be underperforming.
Look for signs such as unusual fan noise, overheating, or unexpected shutdowns. These symptoms often indicate that the internal components of your laptop cooling system—such as fans, heat sinks, or thermal paste—may have deteriorated over time. Understanding the root cause of these issues is vital for deciding which parts require an upgrade or a thorough cleaning.
Budgeting and Required Tools
Once you’ve diagnosed your laptop’s cooling performance, the next step is to budget for your upgrade. Costs can vary widely depending on whether you’re planning a simple cleaning and reapplication of thermal paste or a complete overhaul involving new fans, heat sinks, or even an external cooling solution. Setting a realistic budget will help you prioritize the most crucial upgrades without overspending.
In addition to financial planning, you should compile a list of tools and materials needed for the upgrade. Common items include:
- Precision screwdrivers
- Thermal paste
- Compressed air or an anti-static brush for cleaning
- Replacement fans or heat sinks (if required)
- A cooling pad for external cooling enhancement
Having these tools on hand before you begin will ensure a smooth, uninterrupted upgrade process. It’s also wise to consult your laptop’s manual or online guides specific to your model, as some laptops require specialized tools or procedures.
Researching Upgrade Options
When planning to enhance your laptop cooling system, research is key. Explore various upgrade options available in the market. Read reviews and user experiences on reputable tech websites, and check out forums where laptop enthusiasts share their upgrade journeys. For instance, sites like Laptop Mag provide in-depth reviews and comparisons that can help you choose the best components suited for your laptop.
Consider both internal and external solutions. Sometimes, a combination of upgrading internal components along with investing in an external cooling pad can yield the best results. As you compare different products, pay attention to compatibility with your laptop model and the warranty terms offered by manufacturers. It’s crucial that the components you select work seamlessly with your existing system to avoid further complications.
Safety and Preparation
Upgrading a laptop cooling system involves working with delicate electronic components, so safety should be your top priority. Always power down your laptop and disconnect it from any power source before starting any disassembly. Using an anti-static wristband can help prevent electrostatic discharge, which can damage sensitive parts. Ensure that your work area is clean, well-lit, and free of any hazards that might compromise the integrity of your device.
Preparation also means having a clear roadmap for the upgrade process. Sketch out a step-by-step plan or checklist that covers every aspect—from disassembling the laptop to testing the new cooling components. By following a structured approach, you reduce the risk of errors and ensure that nothing is overlooked. Additionally, documenting your progress with photos or notes can be helpful if you need to reassemble the device later on.
Planning for Future Upgrades
While this upgrade will significantly improve your laptop cooling system, it’s also wise to think about future maintenance and potential enhancements. Consider how the cooling system might evolve with software updates, new hardware demands, or changes in usage patterns. By planning ahead, you can set up a schedule for routine maintenance checks and even budget for future upgrades. Regular cleaning, periodic reapplication of thermal paste, and monitoring temperature fluctuations are all part of a proactive maintenance strategy.
Taking the time to carefully plan your upgrade ensures that your laptop not only performs better immediately but remains in optimal condition for years to come. With all these pre-upgrade considerations in place, you’re now ready to proceed to the hands-on portion of your project—the detailed, step-by-step guide to upgrading your laptop cooling system.
Step-by-Step Guide to Upgrading Your Laptop Cooling System

Upgrading your laptop cooling system may sound daunting, but with a clear, systematic approach, it becomes an achievable DIY project. This section will guide you through each step, ensuring that you make the most of your upgrade while minimizing risks. The following five-step blueprint outlines everything from disassembly to testing, giving you the confidence to tackle even the most technical aspects of your upgrade.
Step 1: Disassembling Your Laptop
Before you start working on your laptop’s internal components, it’s essential to disassemble your device carefully. Begin by gathering all the necessary tools and creating a clean workspace. Ensure that your laptop is fully powered down, unplugged, and that you’re grounded using an anti-static wristband. Follow your laptop’s service manual closely to avoid damaging any components. Carefully remove screws, and use small containers to keep them organized for reassembly later. As you open the casing, pay close attention to the connectors and cables attached to the laptop cooling system components.
During the disassembly, take your time and consider documenting the process with photographs. This documentation can be invaluable during reassembly, ensuring that every cable and component is returned to its proper place. Many users find that the disassembly process offers insights into potential areas where the cooling system has accumulated dust or where thermal paste may have degraded.
Step 2: Cleaning and Preparing Components
Once you’ve accessed the internal components of your laptop cooling system, the next step is to thoroughly clean them. Use compressed air to blow away dust from fans, heat sinks, and vents. For stubborn grime, a soft, lint-free cloth or a brush can be effective. If the thermal paste on the CPU or GPU appears dried out or uneven, carefully remove the old paste using isopropyl alcohol and a lint-free cloth. This step is critical because a fresh layer of thermal paste can drastically improve the heat transfer efficiency between your processor and the heat sink.
Step 3: Installing Upgraded Components
Now comes the exciting part—installing your new or upgraded cooling components. Whether you’re replacing fans, upgrading the heat sink, or applying a new layer of thermal paste, follow the manufacturer’s instructions meticulously. If you’re installing additional cooling aids such as a custom cooling pad or external fans, ensure that these components are properly aligned and securely connected. It’s important to handle each part with care and to avoid overtightening screws, which could damage the chassis or the components of your laptop cooling system.
During this phase, you may find it helpful to use a checklist to ensure that every component is correctly installed. The upgrade should not only focus on replacing worn-out parts but also on optimizing the airflow. Repositioning cables and components to avoid obstruction can further enhance the cooling efficiency. Always double-check that all connections are secure before proceeding to the next step.
Step 4: Reassembling and Securing Your Laptop
After installing the upgraded components, carefully reassemble your laptop. Follow your documented steps in reverse order, ensuring that all cables, screws, and connectors are returned to their original positions. This is also the time to verify that your newly installed laptop cooling system components are functioning correctly before fully closing the chassis. Reassembly should be done slowly and methodically to avoid any misalignment or damage.
Step 5: Testing and Troubleshooting
With your laptop fully reassembled, it’s time to test the new laptop cooling system. Power on the device and monitor the temperatures using your preferred diagnostic software. Run a series of tests under load—such as playing a video or running a benchmarking tool—to check if the cooling performance has improved. If you notice any unusual behavior, such as persistent high temperatures or unexpected shutdowns, refer back to your upgrade steps to identify potential issues. Common troubleshooting tips include reapplying thermal paste, ensuring fans are spinning properly, and verifying that no cables obstruct the airflow.
This step-by-step process is designed to demystify the upgrade of your laptop cooling system. By following these detailed instructions, you can tackle the upgrade confidently and safely, ultimately enhancing the performance and longevity of your laptop.
Maintenance, Future Upgrades, and Best Practices
Upgrading your laptop cooling system is only half the battle; maintaining it is crucial to ensure long-term performance and durability. In this final section, we’ll discuss best practices for routine maintenance, strategies for future upgrades, and tips to maximize the lifespan of your device.
Routine Maintenance
Even after a successful upgrade, regular maintenance of your laptop cooling system is essential. Schedule routine cleanings to remove dust and debris from internal components and external vents. Use compressed air to clear out fans and heat sinks, and consider reapplying thermal paste every 12 to 18 months to ensure optimal heat transfer. Establishing a maintenance routine can prevent overheating issues and extend the overall life of your laptop.
A helpful tip is to perform a visual inspection of your cooling components every few months. Look for signs of wear or damage that might indicate that additional maintenance or an early upgrade is necessary. With proper care, your laptop cooling system will continue to perform efficiently, even under demanding conditions.
Enhancing Longevity and Performance
Beyond routine maintenance, there are several strategies you can employ to enhance the longevity of your laptop cooling system. For instance, consider investing in an external cooling pad that complements the internal upgrades. Not only does this add an extra layer of cooling, but it also helps distribute the thermal load more evenly. Additionally, keeping your laptop in a cool, well-ventilated environment can significantly reduce the strain on your cooling system.
Staying informed about the latest technological advancements is another best practice. New cooling solutions and upgrade kits are continually being developed. By keeping an eye on reputable sources and technology reviews, you can be among the first to implement cutting-edge improvements to your laptop cooling system.
Planning Future Upgrades
Technology evolves rapidly, and what is considered an optimal cooling solution today might be surpassed by new innovations tomorrow. Plan for future upgrades by periodically reviewing the performance of your cooling system. Keep an inventory of compatible components and consider setting aside a budget for periodic enhancements. This forward-thinking approach ensures that your laptop cooling system remains efficient as software demands and hardware capabilities evolve.
Creating a maintenance log or journal can be particularly useful. Documenting each upgrade, cleaning session, and performance test provides valuable insights into the system’s long-term behavior. This record can guide your future upgrade decisions and help you spot patterns that might indicate the need for proactive maintenance.
Best Practices for Optimal Cooling
To maximize the efficiency of your laptop cooling system, it’s important to adopt best practices that go beyond the hardware. Here are a few key tips:
- Avoid Blocked Vents: Always use your laptop on a hard, flat surface to ensure that the airflow isn’t obstructed.
- Control Ambient Temperature: Work in a cooler environment to reduce the workload on your cooling system.
- Monitor Performance: Use software tools to keep a close eye on temperature fluctuations, especially during heavy usage.
- Educate Yourself: Stay up-to-date with online resources, forums, and tech reviews that offer new insights and tips.
By integrating these best practices into your routine, you can ensure that your laptop cooling system not only performs optimally immediately after the upgrade but continues to do so well into the future. With consistent care and periodic enhancements, you’ll enjoy a more reliable and efficient computing experience.
Conclusion
Upgrading your laptop cooling system can transform the performance and longevity of your device. By understanding the internal and external components, carefully planning your upgrade, and following a detailed, step-by-step guide, you empower yourself to maintain a cooler, more efficient laptop. Regular maintenance and future-proofing strategies ensure that your device remains resilient against overheating, even as technology and usage demands evolve.
Embrace the process with confidence, knowing that each upgrade not only enhances performance but also extends the lifespan of your investment. With this ultimate 5-step blueprint, you’re now well-equipped to tackle the challenges of a sluggish cooling system and step into a world of improved computing efficiency. Enjoy the journey, and remember: a well-cooled laptop is a happy laptop!
Frequently Asked Questions (FAQs)
How often should I clean my laptop cooling system?
It’s recommended to clean your laptop cooling system every 3-6 months, depending on your usage environment. Regular cleaning helps prevent dust buildup that can lead to overheating.
Can I upgrade my laptop cooling system myself, or should I seek professional help?
Many users can successfully upgrade their laptop cooling system with the right tools and careful instructions. However, if you’re not confident in disassembling your device, it’s best to seek professional assistance.
What signs indicate that my laptop cooling system needs an upgrade?
Common signs include frequent overheating, thermal throttling, excessive fan noise, and unexpected shutdowns. Monitoring software can also alert you to abnormal temperature readings.
How important is thermal paste in maintaining an effective cooling system?
Thermal paste is critical as it improves heat transfer between the CPU/GPU and the heat sink. Over time, it can dry out, so reapplying it during an upgrade is highly recommended.